I am going to do my best to make a simple tutorial for those who want to make a twitter bot. This only covers a bot that will respond to tweets and things like that. The bot will live on a server so you don't have to keep your computer running to keep the bot alive. That's a good thing. Your source Twitter account will need to be public for this to work.
The next step is to actually create the bot. Over on Github, boodoo_ebooks is a great template that is perhaps the easiest way to set this up. Let me walk you through:
- Make a new Twitter account for your bot.
- Add your phone number to your bot. (You can use a Google Voice number if you want)
The next step is to actually create the bot. Over on Github, boodoo_ebooks is a great template that is perhaps the easiest way to set this up. Let me walk you through:
Now that you have a Heroku account and a Twitter account for your bot (and verified the emails for both accounts), click this link.
This will popup a window that looks like below:

You do not have to fill out the App Name, so scroll down to the "Config Variables"
- In the BOT_NAME field, input your bot's twitter account username without the @ symbol.
- In the SOURCE_USERNAME field, enter your original Twitter account name that you'd like your bot to pull tweets from without the @.
Now, pay very close attention to the terminology I use here as it can be confusing to new users. Leaving the Heroku page open, go to the Twitter Apps page. Before doing this, make sure you have a phone number attached to your Twitter bot's account and that you are logged into your bot's account or you will not be able to accomplish this next step.
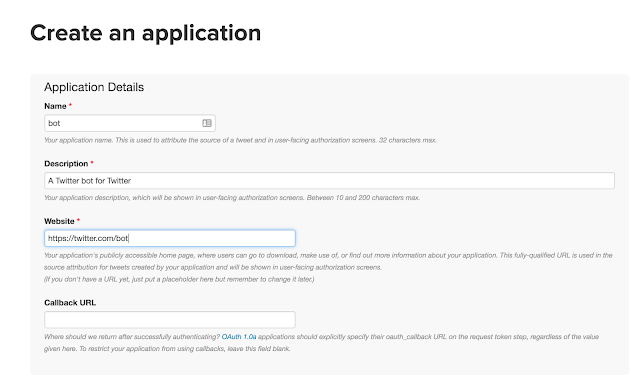
- Click "Create New App"
- Fill out the name, description, and website field however you like. Typically I name the Application the same as my bot's twitter name and make the website link to my bot's twitter profile.
- You do not need to fill out the "Callback URL" field.
- Scroll down, check the "Yes, I agree" button and then click "Create your Twitter Application"
- If you aren't able to create the app, you probably don't have a phone number attached to your Twitter bot account.
- You should be taken to this page:

- Click the "Permissions" tab.

- Click "Read, Write and Access direct messages"
- Click Update Settings.
- Click the "Keys and Access tokens" tab.
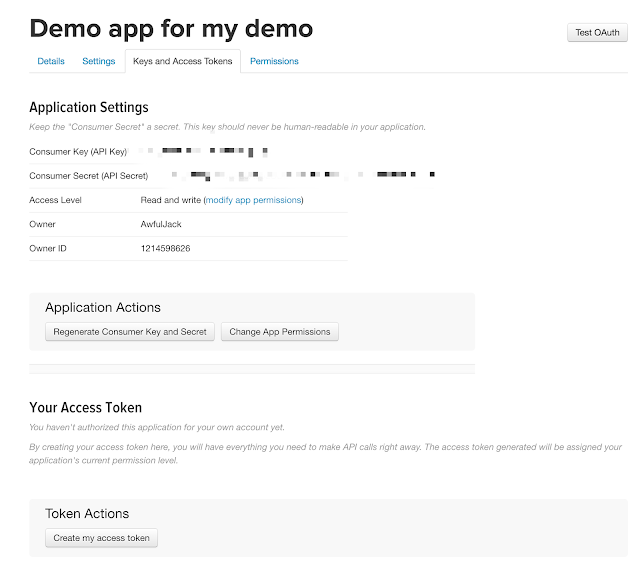
- Click "Create my Access Token"
- You should now have an "Access Token" and an "Access Token Secret"
Now, open back up the Heroku page from earlier.
- In the "CONSUMER_KEY" field, copy and paste the code from the "Consumer Key (API Key)" field from your Twitter App page.
- In the "CONSUMER_SECRET" field, copy and paste the code from the "Consumer Secret (API Key)" field from your Twitter App page.
- In the "ACCESS_TOKEN" field, copy and paste the code from the "Access Token" field from your Twitter App page.
- In the "ACCESS_TOKEN_SECRET" field, copy and paste the code from the "Access Token Secret" field from your Twitter App page.
- Make sure there are no spaces before and after the codes once you paste them.
For example:

- In the "TWEET_INTERVAL" field, this is where you set the interval between automatic tweets for your bot. Assbott is set to "29m" for every 29 minutes. You can set this however you'd like. The default is "2h" for every 2 hours.
- "TWEET_CHANCE" is how much of a chance you'd like your bot to have when it hits that time interval. The default is 0.8, meaning your bot has an 80% chance to tweet every time it hits the amount of time you specified. You can set this to 1.0 if you'd like it to tweet 100% of the time the time interval hits.
- "BLACKLIST" is where you can set who you'd like your bot to not ever respond to or follow. By default, it's set to Dril and tinysubversions. You can add additional usernames without the @ seperated by a comma.
- "BANNED_TERMS" are the words you'd like your bot to ignore if tweeted. Separate these by commas.
- "SPECIAL_TERMS" are words you'd like your bot to think of as being special so that your bot will engage more if it sees them. For instance, if I specify "Twitter" to be a special term, my bot is more likely to like, retweet, or reply to a tweet that has "Twitter" somewhere in it. Special terms are also automatically defined when your bot is updated, so this isn't a necessary field unless you want to tip the scales a little bit. Separate these by commas.
- "DEFAULT_DELAY" is the delay range your bot will use when it decides to tweet. By default it is set to "5..60" meaning between 5 and 60 seconds. Twitter has a somewhat strict limit on how many tweets, follows, etc. it can do within a certain amount of time, so it's good to have some sort of delay. I would leave this alone unless you're certain you want to change it.
- The "DM_DELAY", "MENTION_DELAY", and "TIMELINE_DELAY" fields are the same as the "DEFAULT_DELAY" field. I'd leave these alone unless you know what you're doing.
- "TIMEOUT_SLEEP" is, in seconds, how long you'd like your bot to go to sleep if it hits a rate limit. I'd leave this alone.
- "MAX_ERROR_RETRIES" is how many times you'd like your bot to retry to connect after it is disconnected from the Twitter server. You should have no reason to change this one.
- "UPDATE_FOLLOWS_INTERVAL" can be set the same way as "TWEET_INTERVAL". Your bot will autofollow those who follow it at the time interval you specify here. The default is 90 minutes which is a good place to keep it to prevent rate limiting errors.
- Click "Deploy for Free"
Now, assuming you specified everything correctly, your bot should deploy on the server after about 30 seconds. Just one more step and we're done.
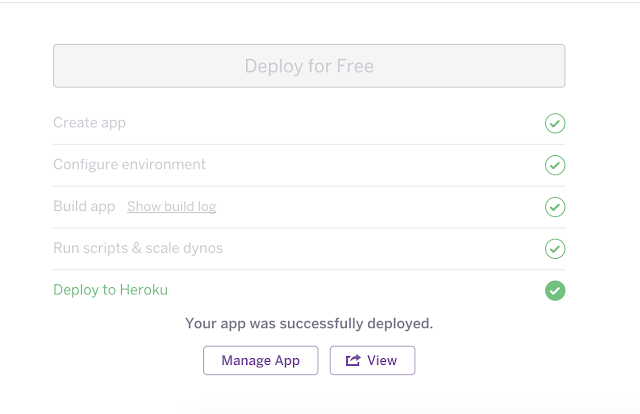
- Click "Manage App"
- Click the "Resources" tab

- Click the pencil icon next to "$0.00".
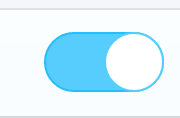
- Click the toggle that looks like this:
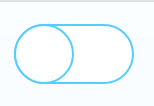
- So that it looks like this:
- Click the "Confirm" button.
Now, you should be done and your bot should be running. Try replying to it with your normal account to double check. It should reply back with a garbled sentence from your tweet history.
Using your normal account, you can DM your bot commands like "mention, follow, unfollow, block, and tweet". If you DM your bot (without quotes) "mention @twitter", it should tweet something at @twitter. This implementation I have found to be temperamental however so don't be surprised if it doesn't work all that well.


- Click "Create New App"
- Fill out the name, description, and website field however you like. Typically I name the Application the same as my bot's twitter name and make the website link to my bot's twitter profile.
- You do not need to fill out the "Callback URL" field.
- Scroll down, check the "Yes, I agree" button and then click "Create your Twitter Application"
- If you aren't able to create the app, you probably don't have a phone number attached to your Twitter bot account.
- You should be taken to this page:

- Click the "Permissions" tab.

- Click "Read, Write and Access direct messages"
- Click Update Settings.
- Click the "Keys and Access tokens" tab.

- Click "Create my Access Token"
- You should now have an "Access Token" and an "Access Token Secret"
- In the "CONSUMER_KEY" field, copy and paste the code from the "Consumer Key (API Key)" field from your Twitter App page.
- In the "CONSUMER_SECRET" field, copy and paste the code from the "Consumer Secret (API Key)" field from your Twitter App page.
- In the "ACCESS_TOKEN" field, copy and paste the code from the "Access Token" field from your Twitter App page.
- In the "ACCESS_TOKEN_SECRET" field, copy and paste the code from the "Access Token Secret" field from your Twitter App page.
- Make sure there are no spaces before and after the codes once you paste them.

- In the "TWEET_INTERVAL" field, this is where you set the interval between automatic tweets for your bot. Assbott is set to "29m" for every 29 minutes. You can set this however you'd like. The default is "2h" for every 2 hours.
- "TWEET_CHANCE" is how much of a chance you'd like your bot to have when it hits that time interval. The default is 0.8, meaning your bot has an 80% chance to tweet every time it hits the amount of time you specified. You can set this to 1.0 if you'd like it to tweet 100% of the time the time interval hits.
- "BLACKLIST" is where you can set who you'd like your bot to not ever respond to or follow. By default, it's set to Dril and tinysubversions. You can add additional usernames without the @ seperated by a comma.
- "BANNED_TERMS" are the words you'd like your bot to ignore if tweeted. Separate these by commas.
- "SPECIAL_TERMS" are words you'd like your bot to think of as being special so that your bot will engage more if it sees them. For instance, if I specify "Twitter" to be a special term, my bot is more likely to like, retweet, or reply to a tweet that has "Twitter" somewhere in it. Special terms are also automatically defined when your bot is updated, so this isn't a necessary field unless you want to tip the scales a little bit. Separate these by commas.
- "DEFAULT_DELAY" is the delay range your bot will use when it decides to tweet. By default it is set to "5..60" meaning between 5 and 60 seconds. Twitter has a somewhat strict limit on how many tweets, follows, etc. it can do within a certain amount of time, so it's good to have some sort of delay. I would leave this alone unless you're certain you want to change it.
- The "DM_DELAY", "MENTION_DELAY", and "TIMELINE_DELAY" fields are the same as the "DEFAULT_DELAY" field. I'd leave these alone unless you know what you're doing.
- "TIMEOUT_SLEEP" is, in seconds, how long you'd like your bot to go to sleep if it hits a rate limit. I'd leave this alone.
- "MAX_ERROR_RETRIES" is how many times you'd like your bot to retry to connect after it is disconnected from the Twitter server. You should have no reason to change this one.
- "UPDATE_FOLLOWS_INTERVAL" can be set the same way as "TWEET_INTERVAL". Your bot will autofollow those who follow it at the time interval you specify here. The default is 90 minutes which is a good place to keep it to prevent rate limiting errors.
- Click "Deploy for Free"

- Click "Manage App"
- Click the "Resources" tab

- Click the pencil icon next to "$0.00".
- Click the toggle that looks like this:
- So that it looks like this:
- Click the "Confirm" button.
Using your normal account, you can DM your bot commands like "mention, follow, unfollow, block, and tweet". If you DM your bot (without quotes) "mention @twitter", it should tweet something at @twitter. This implementation I have found to be temperamental however so don't be surprised if it doesn't work all that well.
